Are you not getting our emails? Important information going into your spam box? Then you need to whitelist our emails.
Any email server will do their best to block unwanted mail such as spam, scams, and phishing. Email users are probably familiar with those emails that want you to confirm what your password or username is, or a store that you usually shop at sends you 10-15 emails in one day. For this reason, we recommend whitelisting.
Whitelisting is manual task where you decide what you want shown in your primary inbox and what should go to spam.
Here at PageMaster, we want you to be aware with what’s going on in the PageMaster community. As a result, we try to ensure you get our personalized emails referring to your own projects and more information.
Whether you use Gmail, Hotmail, Yahoo! or Outlook, you can whitelist any domain you want to make sure your mail always goes to your main inbox rather than spam.
How do you go about it? Follow these quick and easy steps to know how receive PageMaster emails.
***Note: This guide will specifically pertain to gmail users, but each step is still as follows for any email user domain***
Step 1: Login
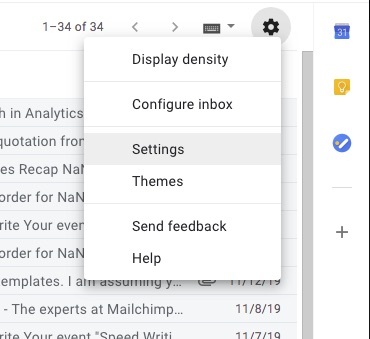
Sign in to your email account. Once you are logged in, click on your gear icon and go to settings.
Step 2: Add pagemaster.ca address to your contacts
Your contact should be saved immediately and the system knows it’s an address to trust when delivered. In the gmail settings bar, click on ‘filters and blocked addresses.
Step 3: Create a filter
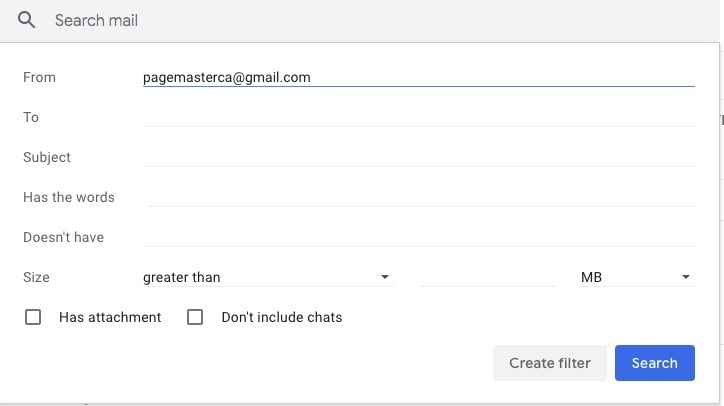
While in the ‘filters and blocked addresses’ section, scroll down to ‘create a new filter.’ At that step, you will add the address you want to whitelist in the ‘From’ field
Step 4: Mark Messages as ‘Not Spam’
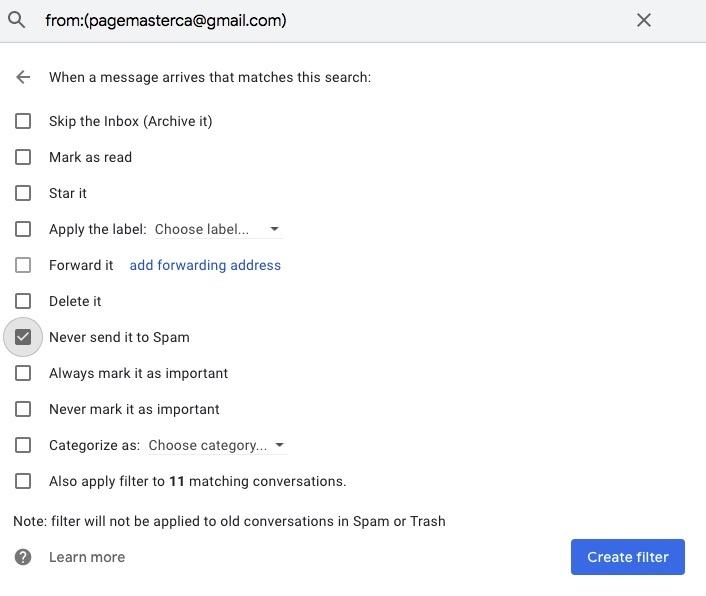
Sometimes gmail or any email server will list what you want to whitelist as spam. Simply mark the messages as ‘never send it to spam’ so it will remain in your regular inbox. Then press ‘Create Filter.’
For more PageMaster news and information, visit our blogs.
Understanding PageMaster Sites(Opens in a new browser tab)
Celebrating 23 Years at PageMaster Publishing(Opens in a new browser tab)
Adding a Blog Post to your PageMaster Site(Opens in a new browser tab)


